Установка Java (JRE) | Mac OS 10.7 и более поздние версии
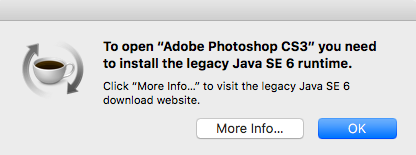
При запуске любого из приложений Adobe возникает ошибка «необходимо установить более раннюю версию Java SE 6».
Решение
В Mac OS 10.7 (Lion) и более поздних версиях Java Runtime больше не устанавливается автоматически в составе программного обеспечения ОС. Чтобы установить Java Runtime, используйте следующие методы.
Способ 1
Можно загрузить и установить последнюю версию Java Runtime с веб-сайта Java: Загрузка бесплатного программного обеспечения Java.
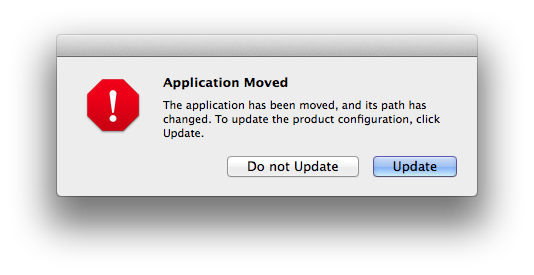
В Mac OS 10.10 (Yosemite), при запуске любого продукта Adobe может появиться предупреждение: «Приложение было перемещено, и путь к нему изменился…».
Нажмите кнопку Восстановить сейчас или Обновить, чтобы обновить местоположение и устранить неполадку. При появлении запроса на ввод пароля введите пароль системы, чтобы завершить операцию.

Способ 2
Если служба Java Runtime не установлена, при первом запуске любого продукта Adobe появляется запрос на ее установку. Следуйте инструкциям в диалоговом окне уведомления о необходимости установить Java, чтобы установить службу.
Способ 3 (Mac OS 10.7 и 10.8)
Следующим способом можно запустить установку службы Java Runtime или убедиться в том, что она уже установлена.
Если приложение Java не установлено, появится следующее сообщение: «Чтобы открыть настройки Java, необходима служба Java Runtime. Хотите установить ее сейчас?»


Дополнительная информация
Для работы некоторых функций приложений Adobe требуется среда Oracle Java Runtime Environment (JRE). Корпорация Apple недавно изменила политику включения компонентов Java в систему Mac OS, и начиная с версии Lion приложение Java больше не входит в состав устанавливаемого ПО. Теперь это один из необязательный вариантов установки, который необходимо выбрать.
Поскольку текущие программы установки Adobe и приложения были разработаны до внедрения этого изменения корпорацией Apple, для работы с приложениями Adobe требуется установка Java. Компания Adobe и корпорация Apple совместно работают над тем, чтобы обеспечить установку Java во время установки ОС. Кроме того, Java можно установить позже, до установки приложений Adobe. При запуске приложения Adobe во время выполнения программы, появляется запрос на установку службы Java, если она еще не установлена. Если перед запуском приложения Adobe служба Java не установлена, в приложении могут отсутствовать или неправильно работать некоторые функции. При возникновении каких-либо проблем установите службу Java, чтобы исправить их. Компания Adobe рекомендует ИТ-организациям установить службу Java (или удостовериться в том, что брандмауэр или антивирусное ПО не блокирует ее установку), чтобы избежать конфликтов с приложениями Adobe.
Если служба Java Runtime не установлена, могут возникать следующие неполадки:
UniFi Controller on MacOS fails to start
Issue description
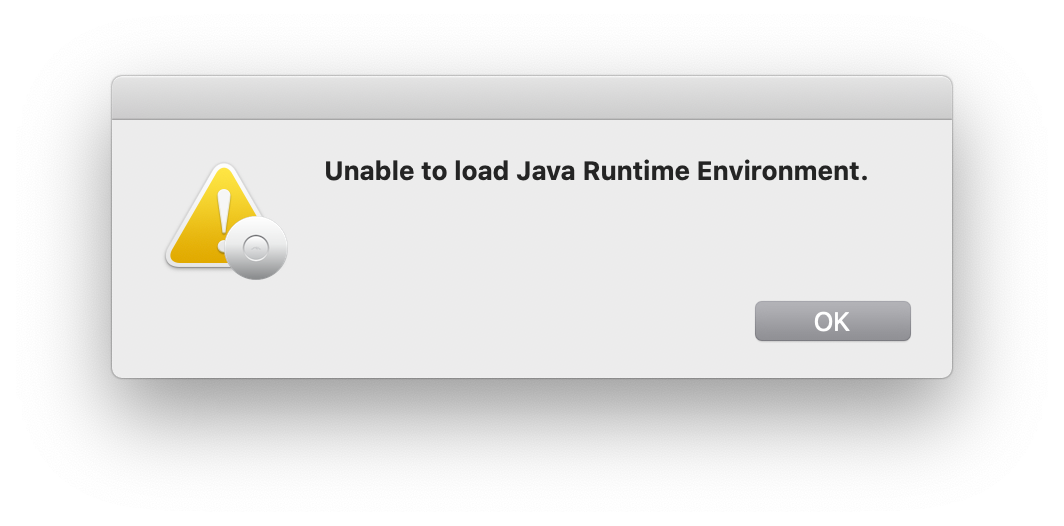
When trying to launch the app, I get an error of Unable to load Java Runtime Environment :
This is after upgrading from an older version. The UniFi team’s response is:
We stopped bundling Java as of UniFi Network 5.11.47. If you’re installing that release or later please make sure you have manually installed a current release of Java 8 beforehand. Only the Java Runtime Environment (JRE) is required. Oracle JRE 8 offers the simplest path as it will simply “just work” without requiring any changes. We may investigate alternative JVMs and update this message accordingly.
Which boils down to:
They ask you to go to https://www.java.com/en/download/ and download the Oracle JRE. At the time of this writing:
Recommended Version 8 Update 281 (filesize: 80.67 MB)
Release date January 19, 2021
Requiring Oracle Java is a mistake for business users, or any commercial use that requires Oracle Java. When Oracle changed the licensing model for Java, the licensing cost and compliance costs for business / commercial users got very expensive.
There are good and better Java distributions, including OpenJDK, AdoptOpenJDK and Amazon AWS Corretto.
OpenJDK 11 and OpenJDK 8 are the current long-term support releases. Requiring Oracle Java 8 is a mistake. If there is a technical reason in the Unifi implementation that somehow requires Oracle Java, that’s even more concerning.
1000s or 10000s of companies have already moved to OpenJDK or Corretto to avoid the licensing costs of Oracle Java. There is no advantage to using Oracle Java. OpenJDK is source-code compatible, and Corretto incorporates bug fixes and performance enhancements in addition to being compatible.
Solution 1
Start with installing Homebrew following the instructions on https://brew.sh/ and install a Java version you like, e.g.:
Then install the start-up script
/bin/unifi.sh (also works with any other Java 8):
Solution 2
This solution requires you to modify the UniFi app files.
Link a Java installation to the UniFi.app:
After the update you should be able to start the app like any other app.
Install Java (JRE) | Mac OS 10.7 and later

某些 Creative Cloud 应用程序、服务和功能在中国不可用。
Issue
An error “you need to install the legacy Java SE 6 runtime”, is encountered when you open any Adobe application.

Solution
With Mac OS 10.7 (Lion) and later, the Java runtime is no longer installed automatically as part of the OS installation. Follow any of the methods below to install Java runtime.
Method 1
On Mac OS 10.10 (Yosemite), when you launch any Adobe product, you might receive a warning «The Application has been moved and its path has been changed. «.
Click Repair Now or Update button to update the location and resolve the issue. When prompted for password, enter your system password to complete.
Method 2
If Java runtime is not installed, you are prompted to install when you first launch any Adobe product. Follow the onscreen instructions in the Java required notification dialog box to install.
Method 3 (Mac OS 10.7 and 10.8)
Use the following method to initiate the Java runtime installation or confirm if it is installed.
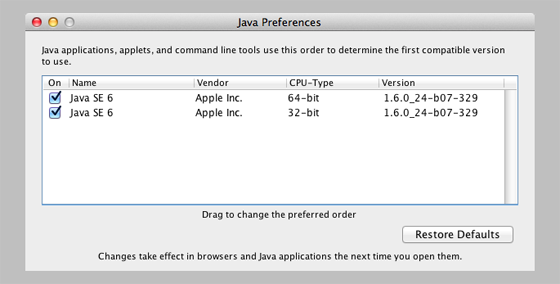
If Java is not installed, you receive the following message: “To open “Java Preferences,» you need a Java runtime. Would you like to install one now?”

Additional information
Many Adobe applications depend on the Oracle Java Runtime Environment (JRE) for some features to work. Apple recently changed the way it includes Java in Mac OS, and with Lion, Java is no longer preinstalled. It is now an optional install that you must select.
Since current Adobe installers and applications were built before these changes by Apple, Adobe software anticipates that Java is installed. Adobe and Apple have worked together to ensure that you can install Java at OS install time. Or it can be installed later before you install Adobe applications. At runtime, when you launch an Adobe application, you are prompted to install Java if it is not already installed. If you do not install Java before running an Adobe application, there can be missing or improperly behaving features. If you encounter any issues, install Java to correct the problems. Adobe recommends that corporate IT organizations pre install Java (or make sure that Java can be installed through their firewalls/security) to avoid conflicts with Adobe applications.
Unable to load Java Runtime Environment #144
Comments
gcbartlett commented Oct 5, 2018
The application (installed either via HomeBrew, or from a direct download/install of DMG) on macOS High Sierra won’t start. It displays a dialog with the message «Unable to load Java Runtime Environment«.

If I look at the MANIFEST.MF file, I see:
This same layout and error occurs if I try to build the application and appbundle from source.
Environment
The text was updated successfully, but these errors were encountered:
kaikramer commented Oct 5, 2018
I have several versions installed via HomeBrew
The layout and manifest file seem wrong, but actually are fine when you run KSE as an app bundle.
Until I have figured out what happens here, you can either download the ZIP package, which includes a shell script (kse.sh) that also works under macOS or you could install a JRE from Oracle.
gcbartlett commented Oct 6, 2018
you can either download the ZIP package, which includes a shell script (kse.sh) that also works under macOS or you could install a JRE from Oracle
Thanks Kai. Both of your suggestions worked. Obviously the latter is preferable as it allows use of the application in the normal way. It would still be good, if it didn’t have to rely on a component installed by the Oracle installation, though.
kaikramer commented Oct 10, 2018
I have tried a newer version of the launcher software that is used to start KSE in the app bundle and it seems to find the Java runtime that was installed via Homebrew. I’ll put it in the next release of KSE, but leave this ticket open in case it doesn’t fully solve the problem.
neetkee commented Oct 29, 2018
Same error with sdkman java with 5.4.1 version
kaikramer commented Nov 2, 2018
@neetkee The problem with sdkman is that it installs the Java runtime under
mouse07410 commented Jan 5, 2019 •
kaikramer commented Jan 6, 2019
@mouse07410 There were inconsistencies in earlier versions of KSE in how extensions were internally stored, which caused some bugs. Those inconsistencies/bugs are fixed, but templates stored with older versions might be incompatible now. I’ll look into it, but it’s certainly not related to JDK11. Then there is a known (and fixed in git) bug that the «Use Standard Template» button does nothing, which is also unrelated to JDK11.
kjjaeger commented Feb 6, 2019
Matching Java Virtual Machines (2):
1.8.0_202-zulu-8.36.0.1, x86_64: «Zulu 8» /Library/Java/JavaVirtualMachines/zulu-8.jdk/Contents/Home
1.8.0_202, x86_64: «Amazon Corretto 8» /Library/Java/JavaVirtualMachines/amazon-corretto-8.jdk/Contents/Home
I get this if one or the other or both of Amazon Corretto 8 or Zulu 8 are installed.
kjjaeger commented Feb 6, 2019
I also tried AdoptOpenJDK jdk8u202-b08 (manually unzipped into /Library/Java/JavaVirtualMachines) Same exact error occurs.
Interestingly AdoptOpenJDK jdk-11.0.2+9 works ok albeit with some warnings:
How to Fix «Java Runtime Environment not found» error
In this post, we will solve «Java Runtime Environment not found error«. This java error is one of the common error faced by developers or end-users. Whenever you try to install any software which requires java like eclipse or Minecraft. Also, if you are new to java development, JDK or Java Development Kit is necessary for you.
Following this tutorial will help you to resolve all Java runtime errors. Additionally, you will learn to install, remove and set java variables in Windows10 and Ubuntu.
Let’s understand some basic concepts of Java runtime first
what is a runtime environment
Target would be JRE or CLR for your program, need to decide by you. As soon as you execute any program, it’s in run time.
JRE vs JDK
| JRE | JDK |
|---|---|
| Stands for Java Runtime Environment | Stands for Java development kit |
| To run Java programs, you need JRE | Helps to build Java programs and applets |
| Platform dependent contains libraries and supporting tool | Platform dependent contains tools development and debugging |
| JRE does not contain development kit. | JDK includes JRE also to execute the program |
Simple JRE VS JDK
What are causes of «Java Runtime environment not found» error
Because JRE is platform-dependent, I have covered java installation, variable setup and un-installation for Windows and Ubuntu both.
Choose Windows 10 or Ubuntu 20.04 from the post and follow step by step to get java issues resolved.
Java download
Step1
Visit oracle.com and download JDK 15 or latest available for your system. I am downloading it for Windows 10 (64-bit). Latest available versions of java are listed in the screenshot. 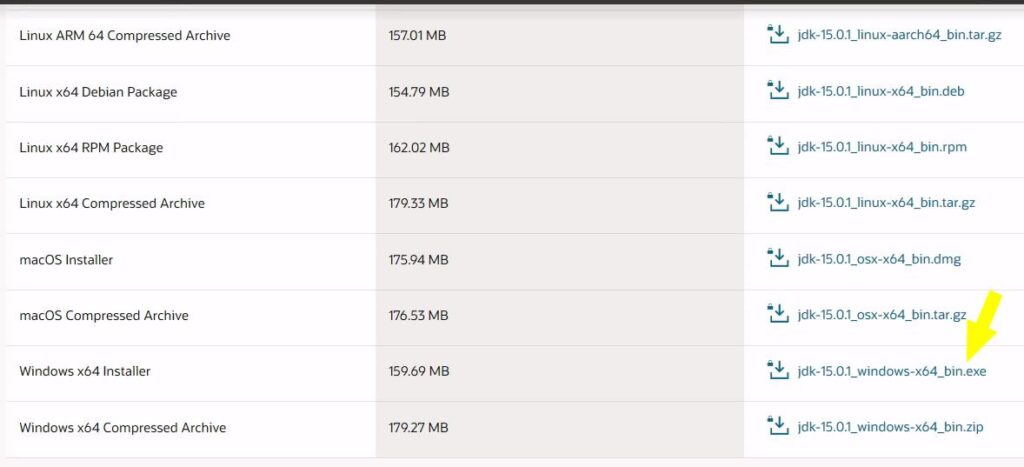
How to install Java runtime environment step by step
Let’s solve 1 st reason of «Java runtime environment not found«, Because of java is not installed.
Step2
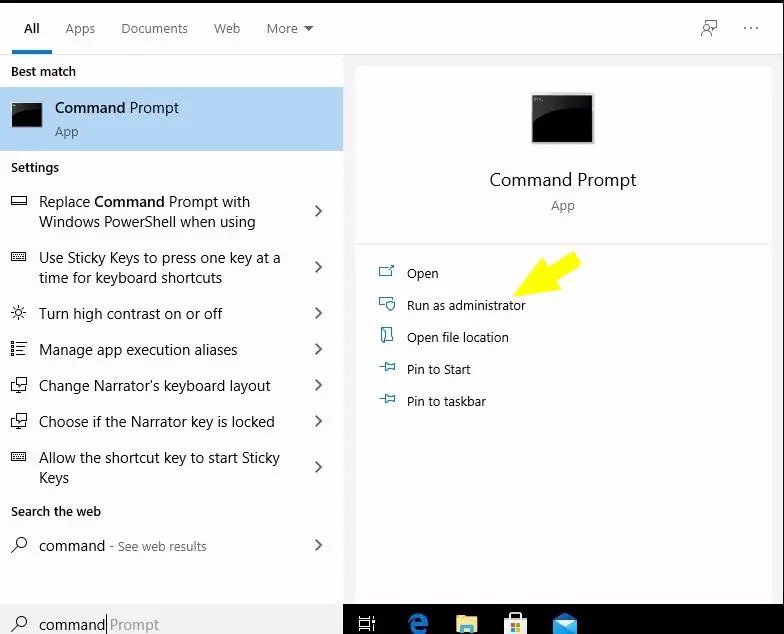
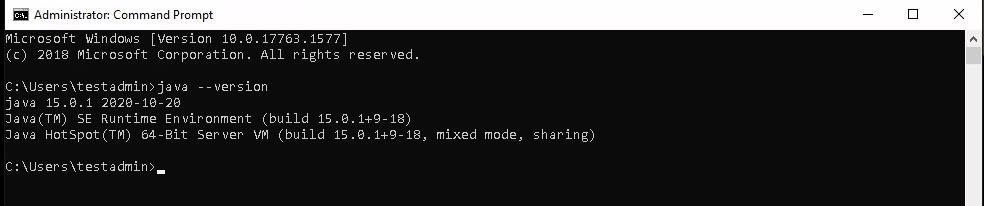
Open command prompt with «Run as administrator» and run java command.

How to install java runtime environment in Windows 10
Step3
Once Download completes. Browse to «jdk-15.0.1_windows-x64_bin.exe» file and double click on it, to run installer. Click Next. 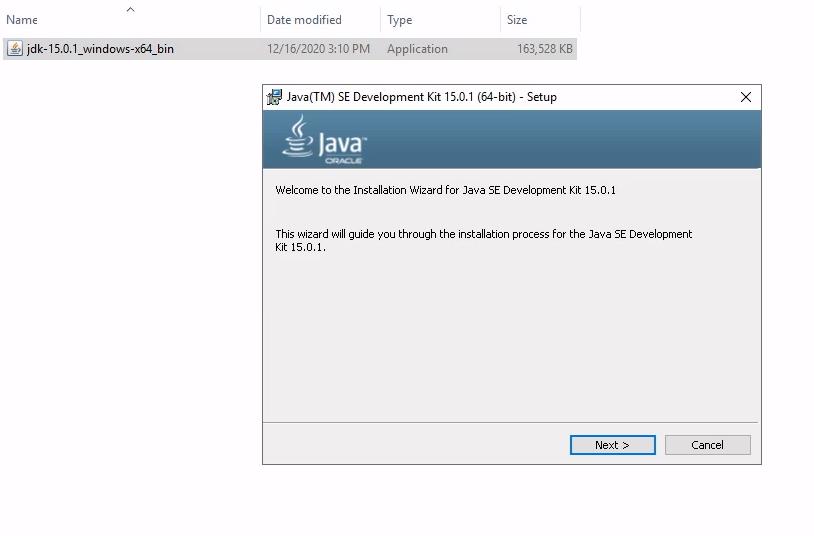
Step4
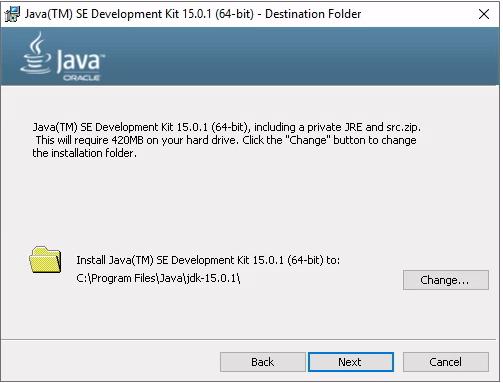
I recommend to keep «C:\Program files\java\jdk-15.0.1 (64-bit)» as default installation folder. Select Next.
You may select different installation folder also. For example, if you are installing second instance of java software. Click on change and browse for target folder.
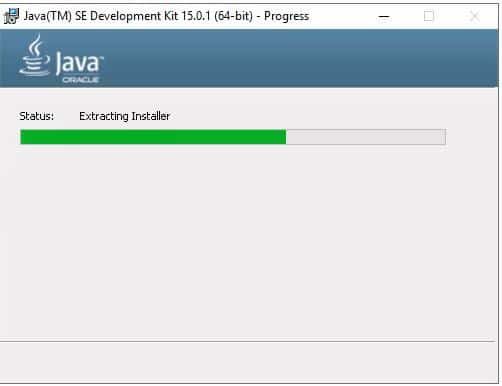
Step5
Let installation complete, it may take few minutes.
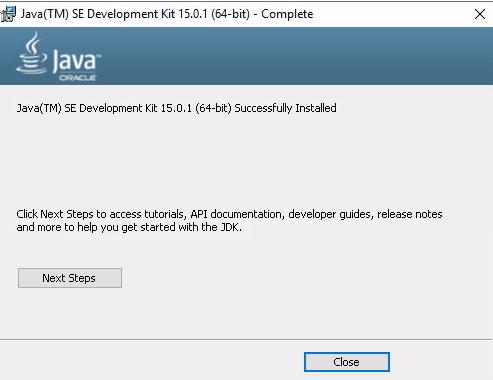
Step6
Click close. Now you are done with java installation on windows 10.
How to set environment variable for java in windows10
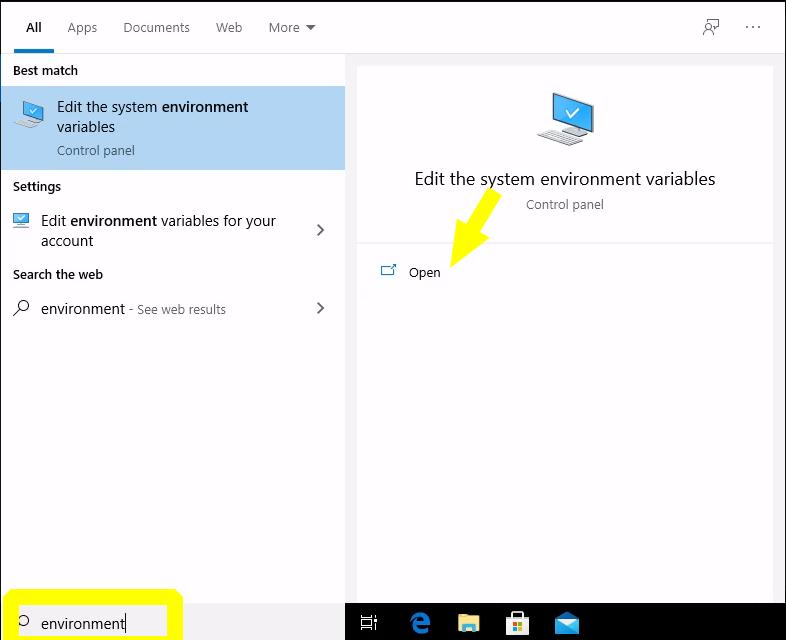
Step7
Type «environment» in search window. Click «open» on «Edit the system environment variables«
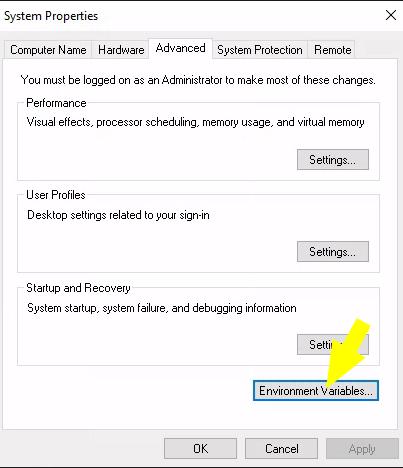
Step8
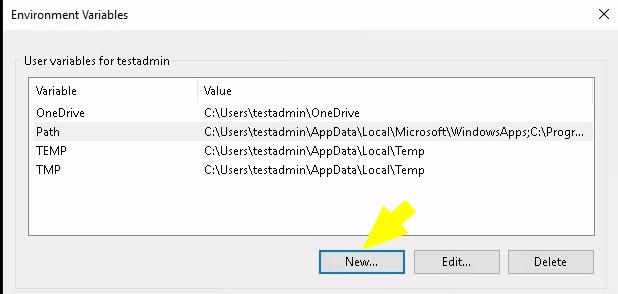
Click on Environment variables.
Step9
Select «Path» > Then click Edit.

Step10
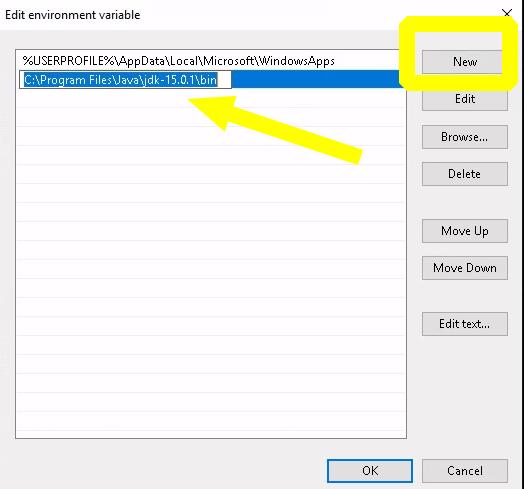
Select New > Give path of java installation directory > For example, «C:\Program files\java\jdk-15.0.1\bin» in my case. If you have selected different folder for java installation in step4. You can enter your path till bin folder.
Click OK.
Step11
Set «classpath» for java. Click «New» in environment variable window. It allows to setup new environment variable.
Step12
In «Variable name», enter «classpath«. Also in «variable value» provide path to your java installation till «lib» folder. In my case it is «C:\program files\java\jdk-15.0\lib > Select OK
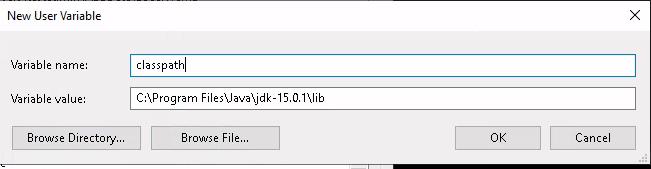
Close all open environment variables windows by selecting OK.
Installation and java variables have been setup. Now, Let’s validate java installation and version.
Step13
Open command prompt with «run as administrator» rights in windows 10.
Step14
Run «java» command to check your Java and JRE (Java Runtime Environment) version.
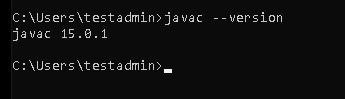
Check java SDK version with javac command
Video tutorial-JRE error solved for Windows
«Java Runtime Environment not found» error fixed for windows 10
How to uninstall java from Windows 10
In case, you are not happy with your old java or JRE version and want to install new. For that, you need to remove old java version.
Cleanup of Java from windows 10 is pretty easy. Follow these steps to remove java from your system.
Step15
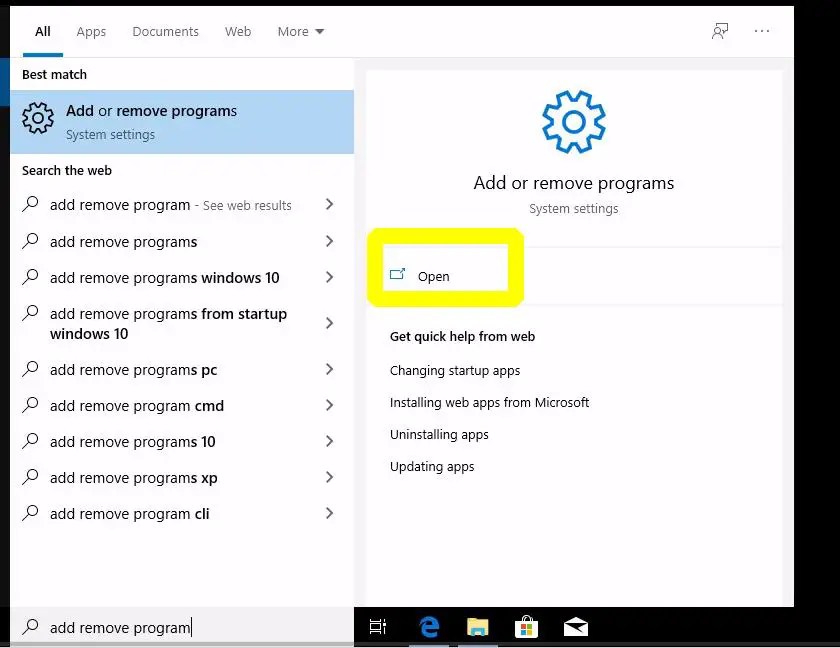
Search add or remove programs and click open
Step16
Select java program and click Uninstall.
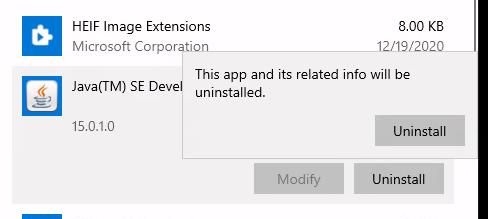
Java software will go from window. You can cleanup java variables also, setup in step10 and 11 earlier.
How to install java runtime environment in Ubuntu 20.04
There are two ways to download and install java or JDK in Ubuntu 20.04
A.) Using apt command
B.) Download Oracle JDK package and install manually
Let’s see both options one by one-
A.) How to install java or JRE in Ubuntu 20.04 using apt command
To install java in Ubuntu using repository, Follow these commands
Step17
Update package index using apt command

Step18
Check if you have any old java version installed in system. In my case, java is not installed.
output
Command ‘java’ not found, but can be installed with:
sudo apt install openjdk-11-jre-headless # version 11.0.9.1+1-0ubuntu1
Step19
Run «apt» command to install java or JRE. I will install default-jre version 2:1.11-72 in my Ubuntu system from list.
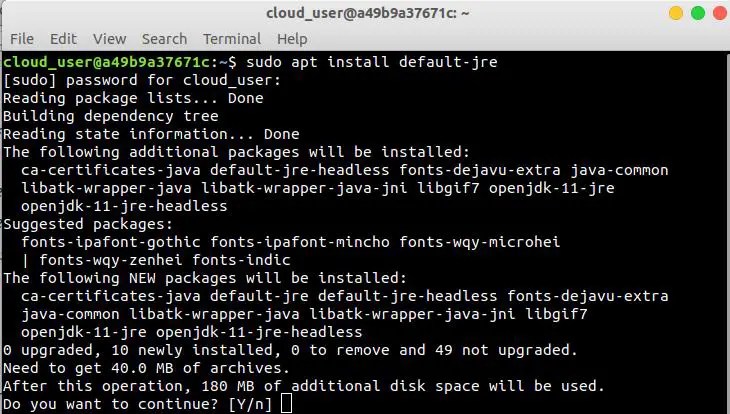
Select «Y» and press Enter. Let installation complete. it will take few minutes.
Step20
Check java version
output

How to Remove java from Ubuntu 20.04
Step21
Run apt command to remove JRE package installed. Press Y and then enter. 
B.) How to install latest java or JDK in Ubuntu 20.04 from oracle (manually)
Step22
Visit oracle.com and download JDK 15 or latest available .deb and transfer to your system. I am downloading Debian package jdk-15.0.1_linux-x64_bin.deb. 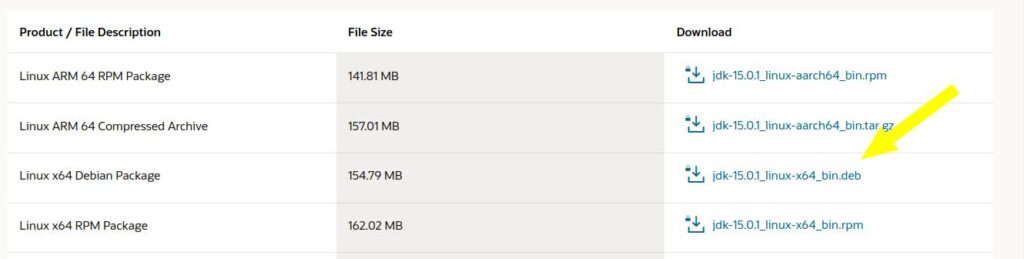
Alternatively, you can download java using wget command.
Reference output 
Step23
Rename .deb file using mv command, if required. Then install Debian package using dpkg command.
output 
Default installation directory path of java would be «/usr/lib/jvm/jdk-15.0.1/«. So, make a note of it, as it will be required to set up a Java_HOME variable.
How to set «JAVA_HOME» variable in Ubuntu 20.04
Set JAVA_HOME variable for all users in Ubuntu by editing environment file.
Step24
Edit /system/environment file
Add path «/usr/lib/jvm/jdk-15.0.1/bin» to the last of the environment file. Then, save and exit.

Run source command to execute changes made in environment file.
Step25
Check your java version

Remove java runtime environment package using dpkg command
Step26
Run dpkg command with —purge option to completely clean java from Ubuntu 20.04
For example, 
Video on «How to fix java runtime environment error in Ubuntu 20.04»
To view this video please enable JavaScript, and consider upgrading to a web browser that supports HTML5 video